
Views: 0 Author: Site Editor Publish Time: 2025-02-22 Origin: Site
With the arrival of the Spring Festival, we not only welcome the moment of bidding farewell to the old and ushering in the new, but also bring new vitality to industrial equipment. As a key equipment in mining, cement, and chemical industries, the regular replacement of lining bricks for ball mills is crucial. This article will detail how to efficiently remove old alumina lining bricks and install new ones, ensuring your equipment operates efficiently in the new year.
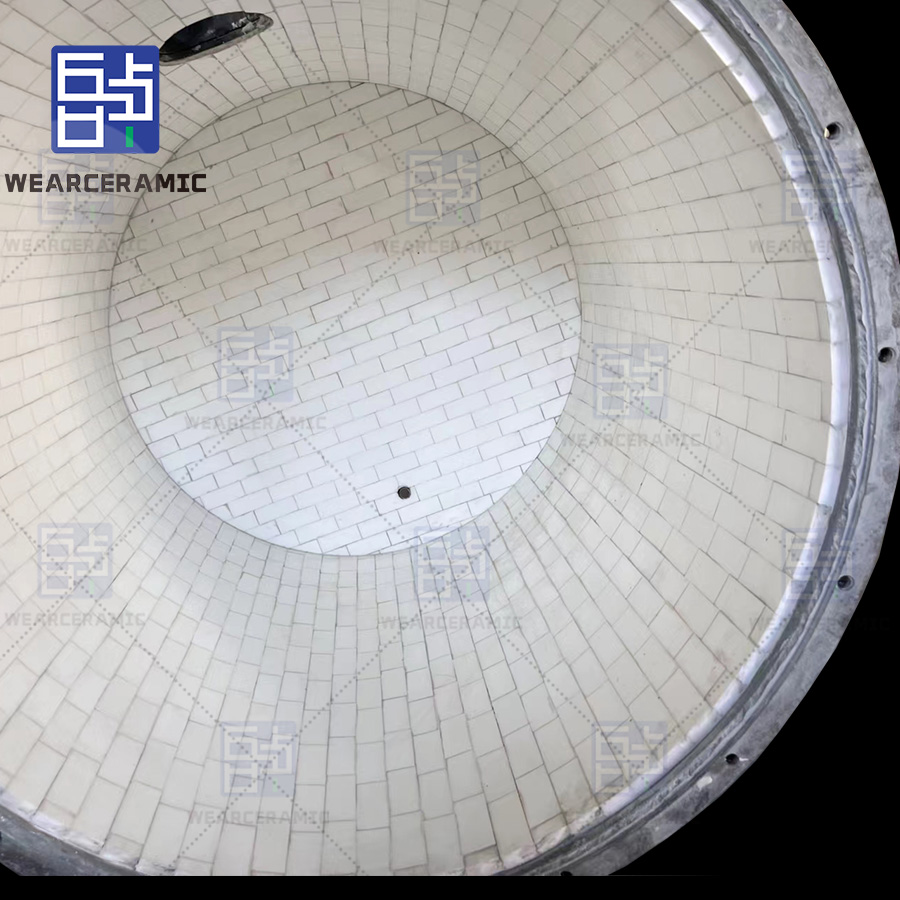
Why Replace Alumina Lining Bricks?
Alumina brick are an important component inside the ball mill, primarily serving to protect the cylinder from wear and improve grinding efficiency. However, as usage time increases, the lining bricks gradually wear out, leading to decreased equipment efficiency and even potential equipment failure. Therefore, regular replacement of lining bricks is key to ensuring long-term stable operation of the equipment.
Steps to Remove Old Alumina Lining Bricks
1. Preparation:
- Power off and lock the equipment: Ensure the ball mill is completely stopped, disconnect the power, and lock the equipment to prevent accidental startup.
- Empty the mill: Remove all materials and grinding media (such as steel balls) from the mill.
- Prepare tools: Gather necessary tools such as crowbars, hammers, pneumatic tools, protective gear, etc.
2. Removal Steps:
- Inspect the condition of the lining bricks: First, check the wear condition of the lining bricks to determine which parts need replacement.
- Start from the feed end: Usually start removing from the feed end, using crowbars and hammers to carefully pry up the lining bricks. If the bricks are difficult to remove, heating with fire can assist in removal.
- Remove step by step: Remove the lining bricks one by one in order, being careful not to damage the mill cylinder.
- Clean residues: After removal, clean any residues and debris inside the cylinder to ensure the surface is clean.

Steps to Install New Alumina Lining Bricks
1. Preparation:
- Inspect new Alumina brick: Ensure the new lining bricks are free of cracks and defects, and that their dimensions meet requirements.
- Prepare tools: Gather installation tools such as rubber mallets, wrenches, bolts, etc.
- Clean the cylinder: Clean the inner wall of the cylinder again to ensure it is free of debris and oil.
2. Installation Steps:
- Start from the feed end: Usually start installing from the feed end, following the design drawings or original arrangement sequence.
- Use a rubber mallet: Gently tap the lining bricks with a rubber mallet to ensure they fit tightly against the cylinder.
- Install step by step: Install the lining bricks one by one in order, ensuring even gaps between each brick.
- Secure bolts: If the lining bricks require bolting, ensure the bolts are tightened but not over-tightened to avoid damaging the bricks.
- Check installation quality: After installation, check the quality of each lining brick to ensure there is no looseness or misalignment.

Precautions
- Safety first: Always wear protective gear such as gloves, helmets, and goggles throughout the process.
- Follow operating procedures: Strictly adhere to the equipment manufacturer's operating procedures to avoid improper operations that could lead to equipment damage or personal injury.
- Regular inspections: After installation, regularly inspect the wear condition of the lining bricks and perform maintenance and replacements in a timely manner.
Bidding farewell to the old and welcoming the new is not only a Spring Festival tradition but also an important time for equipment maintenance. By regularly replacing the alumina brick of the ball mill, you can ensure efficient operation of the equipment in the new year, reduce downtime, and improve production efficiency.


